Installing a smart switch used to mean calling an electrician, cutting into your walls, and dealing with a mess. With Dimi, that’s a thing of the past. Our technology is designed for everyone, empowering you to upgrade any space in minutes.
Ready to see how simple it is? Here’s your complete, tool-free guide to installing a Dimi wireless keypad.
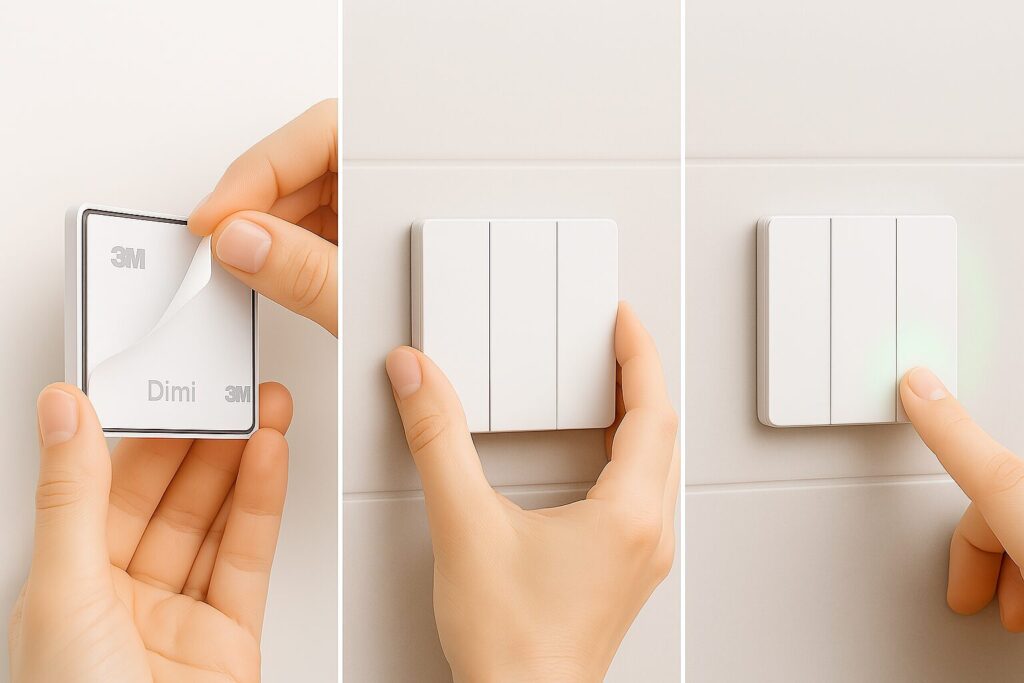
Step 1: Peel and Position
First, decide where you want control. By the bed? On your glass shower door? Next to the kitchen sink? Since there are no wires, your options are limitless.
Once you’ve chosen the perfect spot, simply take your Dimi keypad and peel off the pre-applied adhesive backing. Our industrial-grade adhesive is designed to hold securely on almost any flat surfaces.
Step 2: Stick and Secure
Press the keypad firmly onto the clean, dry surface. Hold it in place for about 10-15 seconds to ensure a strong bond. That’s it. There’s no drilling and absolutely no damage to your walls. It’s the perfect solution for homeowners and renters alike.
Step 3: Press to Pair
Now for the magic. Press any button on your new keypad. This single press generates its own power, sending out a wireless signal to pair with your Dimi receiver (which is just as easy to install on your light or device).
You’ve just installed a fully functional, maintenance-free smart switch. No tools, no mess, and no need to call a professional. You’re ready to enjoy instant, reliable control.
It really is that simple. Ready to experience the freedom of wireless control?